Why is Adobe Photoshop the best tool on the market for textile design and color management?
Adobe Photoshop: The leading tool in the design
In the last decades, Adobe Photoshop has positioned itself as one of the most important tools in the management of pixel-based images. With Photoshop, not only do we have at our disposal a wide range of tools for editing, transforming, and enhancing images, but you can also access a wide range of customized tools that provide the best results regardless of which industry you work in. For instance, our sector: is textile design and printing. With the power of Photoshop and the external add-ons, we have in our hands the perfect tool to make our work faster and more efficient. But do not forget that the job of a textile designer is not over when the design is finished, there are different processes that are necessary and we must ensure their success. One of the most important processes is Color Management.Color management in textile design and printing
Color management is one of the most popular terms in our industry. Broadly speaking, color management is the process of converting the representation of colors in different devices (for example, converting the color we see on a screen to the one we will see on fabric) to reproduce colors as accurately as possible. When we start a creative process, we imagine shapes accompanied by a color palette. This same palette is the one we reproduce when we design and the one we expect to be printed at the time of production. Furthermore, one of the particularities of the textile sector and in particular digital printing is the repetition of the productions: We launch a collection, produce a print run and if it has succeeded, we produce it again. With good color management, not only will it be possible to print what we have sold but also we will be able to repeat the production as many times as necessary without changing the result. So why do you need to know about color management if you are a textile designer? Because it is the only way that the colors we imagine in our head, which we later capture in Photoshop, will be the same ones we will see printed in the collection.Why choose Photoshop for color reproduction?
To the initial question of the post Why is Photoshop the best tool in the market for textile designers? The answer is: Because it is the tool that will best suit your color management needs. And, how do we do it? Photoshop has four key processes that will help us maintain color accuracy throughout the design and printing process:- Allows you to work with embedded profiles: This makes it much easier to work with color management. If we work with an image with an embedded profile, we will see the colors that your output device will be able to reproduce, and we will also be capable of maintaining this information for the production department.
- Allows you to assign color profiles to your designs (Edit > Assign profile): With this tool, you can change the profile you will work with. We will change the initial profile of the image for the one we select. In this process, the RGB coding is maintained but the colors will be changed since the color profiles are responsible for giving the values to the RGB. If these are different, the colors will change to fit the selected profile.
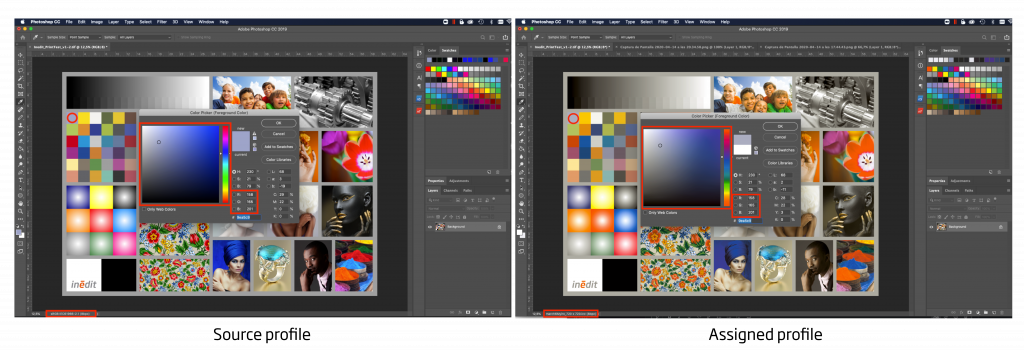
- It has the functions to convert (Edit>Convert to profile) and test a profile (View>Test Fit): The difference between assigning and converting a profile, is that the latter, when we select a profile for change, will not maintain the RGB coding, trying to preserve the color results as much as possible within the profile. The function of testing a profile is very similar to that of converting the profile, but it simply shows it in Photoshop, without modifying the image. This way, we can simulate the output colors of the job. The function of testing a profile is very similar to that of converting the profile, but it does not modify the image, it simply displays a preview of the results in Photoshop. This way, we can simulate the output colors of the work. If we use both tools at the same time, we will have our design prepared with the profile we want to use and, in addition, we will be able to see the simulation once printed on paper or fabric
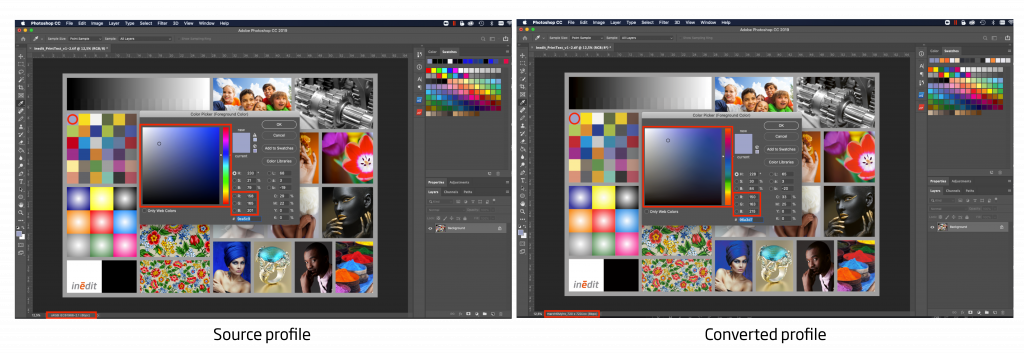
- You will be able to send a file to be printed preserving the color management previously done: Finally, the same tool, as we have mentioned before, will allow you to send all the information about the image and the profile to the production department, so as not to lose any information of our work.
Introduction to color management with Adobe® Photoshop
8 workshops for printing designers for less than 15€
- Botanical Animal house: Animalario botánico: watercolor, ink, and graphite by Violeta Hernández (FREE during the quarantine)
- Personal brand creation based on your patterns by Ana Blooms (Now for 9,90€)
- Introduction to floral illustration with acrylic by Maya Hanisch (Now for 14,90€)
- Design of textile prints by Inés Aguilar - La Casita de Wendy (Now for 12,90€)
- Creative fashion directing by Inés Aguilar - La Casita de Wendy (Now for 10,90€)
- Illustrated pattern design by Ana Sanfelippo (Now for 9,90€)
- Botanical illustration with watercolors by Paulina Maciel (Now for 11,90€)
- Creation of color palettes with watercolor by Ana Victoria Calderón (Now for 9,90€)
neoCatalog: Gestiona tus diseños y aprovéchalos al máximo
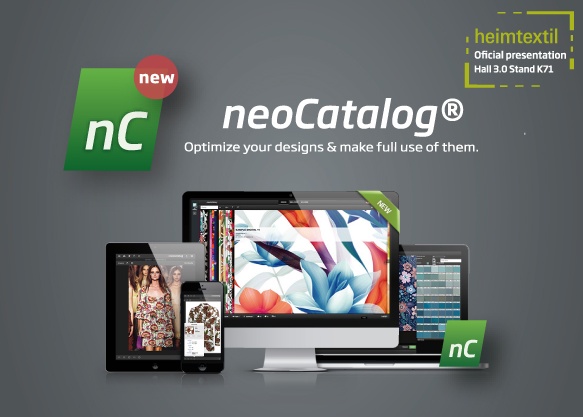
Inèdit Software presents neoCatalog, an interactive catalog especially designed to organize and manage textile designs. With neoCatalog, professionals of textile design and digital printing can take the total control of their jobs, storing them easily, tagging them by keywords and organizing them with personalized galleries.
Furthermore, with neoCatalog they can have their design ready to show to costumers, creating different colorways and allows you to view your designs in any environment, model or object by producing photorealistic simulations.
“neoCatalog is the first tool specially developed for the management of textile designs.” Says Oriol Martínez, Product Owner at Inèdit Software. “We started by creating neoCatalog Server, a version that we customized exclusively for large companies, adapting to their processes. After years of understanding the needs of these clients, we have decided to create a neoCatalog within reach of everyone, for small design studios, freelancers or medium and large companies, who have a considerable volume of designs and want to organize and manage them. At the same time, we continue to develop neoCatalog Server for large companies.”
neoCatalog is also created to facilitate the communication between the agents involved in the workflow. Designs and galleries could be easily shared with an invitation system. In addition, the neoCatalog administrator will be able to decide users privilegies, which can give different benefits to the departments involved in the work process.
“With neoCatalog you could improved the communication between departments. The designers have a space where to organize their work, they store them in galleries separated by seasons so if they need an old design or to see a complete collection it is very comfortable for them. And once finished, they send to the commercial department what they want to sell" continue Oriol Martínez "On the other hand, the commercials can access the catalog, create different colorways, make photorealistic assemblies with different models and show how the design would look in a real environment to the clients, without the need to depend on the designers".
neoCatalog can be used as a sales tool. It’s possible to create personalized layouts where showing the design on a virtual simulation, the colors that has been used and the data of your company or clients one.
neoCatalog is a tool of Inèdit Software, a company with more than 25 years working in the development of software for the textile industry. Together with neoStampa, Rip Software for the digital textile printing and neoTextil, textile design plugins for photoshop, neoCatalog complete a set of solutions designed to generate a 100% integrated workflow, providing agile and effective communication between the departments involved.
